

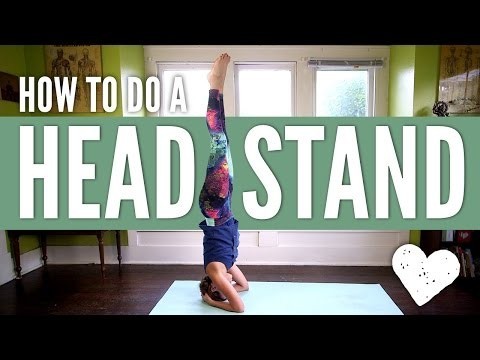
Yoga learning | Head Stand Yoga Pose - How To Do a Headstand for Beginners
본문
※ 영상을 선명하게 보기 안내
- 유튜브 영상에서 오른쪽하단에 톱니바퀴를 클릭합니다.
- 팝업목록에서 "품질" 선택하세요.
- 원하는 해상도를 선택해주세요.
※ 모바일에서 Wifi가 아니라면 데이타가 소진될 수 있으니 주의바랍니다.
Yoga learning님의 Yoga강의 청각장애인을 위한 자막
What's up, everyone?
Welcome to Yoga with Adriene.
I'm Adriene.
And today, we're going to learn a safe way
to get into Headstand.
That's right.
We have an inversion for you today on the
foundations of yoga.
There's so many benefits to this posture.
But it can be a bit tricky if you don't know
the steps to get into it safely and with integrity.
So today we're going to learn how to send
it up with integrity, with strength, and with
balance.
Let's hop on the mat and learn Headstand.
Okay.
So to begin, we're going to come onto all
fours.
And the reason we are going to start here
is because, again, we're focusing on the foundations
of this pose today.
So I want to take it nice and slow.
Don't rush it.
Spread the palms.
Bring them right underneath the shoulders,
so the wrists are right underneath the shoulders.
And so we use this as a little marker from
wherever the palms are, that's where we're
going to drop the elbows.
So the elbows are now stacked right underneath
the shoulders.
And another great way to check this is you
can grab the opposite elbow with your hands,
and press away from the earth, and just check
it out from here.
So this way, you know if you're too wide if
you can't grab the elbows.
This is a nice little marker.
So we just went palms, two elbows.
And then we checked our work, checked our
homework by grabbing our elbows with the opposite
hand.
Okay.
So take a second here to press away from the
earth.
So we're already not starting out here.
If we start out here, it's much harder to
get into this space of integrity in the shoulder
girdle.
So right away, I usually invite my friends,
my students, my homies, to right away start
pressing into the elbows and broadening through
the upper back body.
Okay.
From here, we'll release the palms out.
And right away, because of how tight the shoulders
are, and just because the shoulders speak
to us in this posture, right away the palms
are going to want to come either wider or
become narrow.
So pay attention, my friends.
Keep the wrist in line with the elbow and
that shoulder stacked over.
Okay.
So we have a nice foundation here as we press
in all ten knuckles.
We're going to take a breath in.
As we broaden the upper back body, press away
from the earth.
So you might already start to feel this in
the arms, and in the shoulders, and in the
muscles that wrap around, and that's good!
That means we're building strength.
So often we kind of barrel into this posture
without building the strength that we need
in the arms and around the shoulder girdle.
So take your time on the foundations of yoga.
So you might just stay here, is what I'm trying
to say.
You can bring the gaze straight down, just
below the thumbs, and work here on muscles.
When you get tired, you can curl the toes
under, and then send it back.
Resting the forehead on the earth and letting
the elbows go wide.
So just kind of softening.
And again, we're starting with the very basic
here, but never underestimate the power of
learning the foundation, right, building the
pose beautifully from the ground up.
So then we'll hug the elbows in again.
Make sure they're stacked underneath the shoulders.
Come onto the tops of the feet.
And you might again just press up here.
This time, maybe drawing your navel towards
your spine, really integrating from the crown
of the head to the tip of the tailbone.
So this is option one.
We are building strength here and then we're
rocking it back.
And the we're building strength here and then
we're rocking it back.
Okay?
To take it to the next step, so just progressing
here, we'll keep the elbows where they are,
my friends, and interlace the fingertips.
Open the palms here.
So we're just creating a little pocket here,
eventually a little pillow for the head.
And again, I press away from the earth here
and I create a little triangle.
So I'm pressing into the forearms, pressing
into the elbows.
This is the opposite of that, kind of sulking
into the shoulders.
I press away, drawing the shoulders away from
the ears, broadening through the upper back
body.
Great.
We might just stay here.
You might begin to just work on these muscles.
And then take your rest.
And then come back and work on the muscles.
And that might be your back and forth foundational
flow today.
All right.
So to take it a step further, I'm going to
curl the toes under.
I'm going to bring the top of my head...
So this is the flat part of my head, my friends,
right?
To the earth and pocket the back of my head
with my hands here.
So it's kind of like a little yarmulke or
a sweet little cap on the back of the head.
Great.
Shoulders will want to collapse.
You'll want to keep the integrity in the shoulders
here.
Walk the knees in just slightly.
So from here, I'm really not putting any weight
into my head.
In fact, my head is hovering as of right now.
But then I can release my head back to the
earth and just play with this foundation of
the triangle - of the arms, and the crown
of the head, and the shoulders - drawing away
from the ears.
So I don't mean to sound like a broken record
here, but it's so important to build the strength
in the upper body, in the arms, and in the
shoulder girdle before we begin to lift the
sit bones up.
Okay?
So again, this might be our flow today.
Chilling here and then sending it back.
Now, progressing even further.
So we always have options here.
And we're just taking it super slow and being
super mindful.
Progressing.
We'll press away from the earth.
Thumbs are extended here.
And slowly, begin to lift the sit bones up.
Keep the knees slightly bent here.
Then press away from the earth.
Draw the shoulders away from your ears.
Slight bend in the knees.
Inhale in.
Exhale.
Straighten the legs, drop your heels down
towards the mat.
Inhale, bend your knees.
And exhale, straighten the legs, draw the
heels back.
So we're building strength in the arms here,
building integrity, strength, support...
"Stability" is really the word I'm looking
for, in the shoulder girdle.
One more time.
Bend the knees generously.
And exhale.
Heels down, legs straight.
Great.
You might stay here, you might lower the knees
for a rest, particularly if you're brand new
to head stands, take a rest, okay?
Always take a rest.
Come back with a little freshness.
We'll meet back up here.
Great.
This time, we'll walk the toes together and
begin to bring our awareness now to the navel.
Draw your navel, lower belly, in.
And again, shoulders draw away from the ears
as we broaden the shoulder blades.
And again, navel to spine.
And again, I'm on the flat part of my head
here.
I'm pressing into my elbows.
I'm pressing most of my weight into my forearms
here, not into the head.
Then I might just stay here, or I might continue
to progress, I might walk my toes all the
way up, begin to soften through the knees.
Again, lower belly draws in.
And then first things first, I'm just going
to hug one knee.
It doesn't matter which one, in towards the
chest.
Drawing the toes up towards the sky, squeeze
the lower belly in.
Keep pressing into the elbows.
And you might come onto that big toe of the
opposite foot here.
Breathe, breathe, breathe.
Then we release and check it out on the other
side.
Squeezing.
Checking in with the abdominal wall.
Finding stability.
As we press into the elbows, draw the shoulders
away from the ears.
Inhale in, and exhale, we release.
Slowly lower the knees down, come onto the
tops of the feet, release the arms, and roll
it up.
Great.
Loop the shoulders here.
Inhale.
Carve a line with your nose, forward, up,
and back, so we're not crunching in the back
of the neck by any means, but we're extending
through the crown.
And now, you can interlace the fingertips.
Bring them behind the head, lower than we
were before, so kind of where we do, what
I call Barton Springs pose, so to the Atlas,
the base of the neck...
Not the neck.
The head, here.
Sorry.
I'm all zenned-out after my Headstand.
And I'm going to press the back of the head
into the palms, press the palms into the back
of the neck.
As you do that, broaden through the elbows.
But just have a little moment of reset here.
You might rock a little side to side.
You can close your eyes.
Breathe.
And then release it back to center.
Cool.
If you're done for the day, take a child's
pose, and that's your practice.
If you'd like to progress a step further,
then we're going to dive back in.
So going through our steps: all fours, dropping
to the elbows.
Take a second to check your homework.
Great.
Then we'll interlace, open the palms.
Thumbs are going to extend here.
Great.
Walk the knees in slightly.
Draw the lower belly in as you release the
head to the earth.
Great.
Get situated here.
Find your foundation.
Then we'll take a deep, deep, deep breath
in, and on an exhale, curl the toes under.
Straighten the legs, lift the hips up.
Great.
Again, I'm not crashing weight into the crown
of my head, but using strong arms, strong
foundation in the forearms here to find balance.
Great.
So now, I might squeeze one leg in.
And then switch, and then switch.
And then maybe if I'm ready, I'll slowly begin
to lift both knees in towards the chest.
Now again, pressing into the elbows, drawing
the shoulders away from the ears.
Beautiful.
And then we'll slowly lower one toe back down,
and then the other, and release.
Great.
Unravel.
So slowly, you will trace our steps as we
roll back up.
And same thing as before.
All right.
Send it into child's pose or we'll take it
all the way up.
If you're ready, just send the feet up towards
the sky.
Now, the thing about this is, if you're a
beginner, or even if you're not a beginner
and you just want to work on strength and
alignment, it might be good to go to a wall
here.
In fact, if you're a beginner, I suggest you
go to a wall here or have a buddy behind you.
Often, by rushing this, we can create a ton
of unnecessary soreness, strain.
I hate even saying it.
It's like, "Ouch!" in the neck, and may even
lead to possible injuries.
And you know, I don't play like that.
So don't risk it.
Let's find a wall at this moment.
Or if you have a friend there to help you,
that's a good idea, too.
Okay.
So here we go.
Going through our steps, taking our time,
really building it from the ground up.
For me, setting up poses like this is also,
and I know this sounds cheesy, but like an
act of self-love.
You really care about yourself.
You care about your neck.
And you care about your practice, the quality
of it, and you take your time going into things.
Build.
Let it unfold.
All right.
When you have your foundation set up, follow
your breath.
Inhale in, and exhale.
Lift the hips up.
Walk the toes in.
And remember, you might just stay here today.
To take it a step farther, we'll squeeze one
knee in.
Navel draws in.
Press into your foundation.
And we lift off, squeezing both knees in.
Now, to straighten the legs up, I'm going
to consider my pelvis here.
So you can kind of see my tailbone, pelvis,
going out towards the front edge of my mat
right here.
And this is a great place to just be to build
strength, practicing pressing in the foundation,
connecting the breath.
But to progress, to take it a step further,
I'm going to press up through the ball joint
of my big toe, begin to straighten the legs,
and really lengthen my tailbone up toward
the sky as I draw my navel in.
Squeeze the inner thighs together.
Press away from the earth.
Draw the shoulders away from the ears, and
marry a little bit of length with the strength.
So I'm not clenching my buttocks here, but
I am engaged.
Pressing up through the ball joint of those
big toes, you might find some yogi toes here.
And we breathe.
Breathe.
Keep soft in the skin of the face.
Keep pressing into your foundation.
Shoulders drawing up and away from the ears.
And there's no tension or pressure in my neck
here.
In fact, there's hardly any weight on my head.
Maybe about 20%.
Mostly it's in my forearms.
Breathing, really energetically drawing all
the weight up, up, up through the arches of
the feet.
So you might only take a breath or two here
in the beginning of your practice.
Even if you're against a wall, be mindful
of how long you're upside-down at first.
Listen to your body.
Take your time.
Now with practice, we'll get to be here for
quite a few breaths, really experiencing the
benefits of this posture.
And to come out of the posture, we'll bend
one knee in towards the center, draw the navel
towards your spine, followed by the opposite
knee, in towards center, pressing the arms,
strong core.
And then slowly, one leg at a time, toes release
down.
And down.
Take a deep breath in.
Walk the toes out.
And on an exhale, release the knees to the
earth.
I'm not collapsing the shoulders yet.
Keep drawing the shoulders away from the ears
as I release onto the tops of the feet.
And slowly unravel.
Tuck your chin into your chest.
Roll it up.
And again, we have the option of coming into
a little Barton Springs pose here.
Oh yeah, baby.
Or sometimes, I like to release fingertips
to the mat, fingertips pointing forward, and
just take a second here.
Don't drop the head here.
Draw the shoulder blades together.
Open up.
Just kind of resetting here, creating space.
And then we can release back to center and
take it into child's pose.
So I think it's important to let the blood
flow in the opposite direction again before
we return to child's pose.
And then from here, you can relax.
Maybe massage your third eye a little bit
here.
And if you begin to feel pressure in the neck
here, then that to me says you need to spend
a little more time here, just kind of resetting,
pressing the Atlas, the back of the neck,
into the hands.
Oh yeah.
Or here.
Find your bliss.
Enjoy your practice.
All right, my friends.
So awesome work.
That was a Headstand, an inversion practice
for you.
This is the foundations of yoga.
So again, if you're new to the practice, remember,
nice and slow.
Return to this video again and again, and
see how the practice unfolds.
Even if you've been doing Headstand for a
while, it's never too late to slow it down.
And make sure that you're treating the body
with 110% loving kindness.
All right?
Because that's what our yoga is all about,
right?
Finding what feels good, practicing self-love,
and building strength in the body.
I do guarantee you that if you practice Headstand
with this prep, you're going to build these
babies up.
Like mine are so huge.
Sad.
Just kidding!.
Cancel.
Clear.
Positive thoughts.
No toxic thoughts.
But you will build arm strength, and you will
not experience any pain or a fuzziness in
the neck.
This pose should bring you vitality, a sense
of excitement, confidence, joy, not pain or
fear, or any fuzziness after practice.
So check it out.
Keep exploring it.
Leave questions, comments always below.
We will do another version of Headstand, maybe
a little more intermediate version of this
pose on another day.
But for now, take it nice and slow.
And enjoy how the pose unfolds.
I love you guys.
Take it easy.
Namaste.
댓글 0개
등록된 댓글이 없습니다.