

Premiere & Effe… | How to Animate Text & Graphics to Music (Kinetic Typography Adobe Prem…
본문
※ 영상을 선명하게 보기 안내
- 유튜브 영상에서 오른쪽하단에 톱니바퀴를 클릭합니다.
- 팝업목록에서 "품질" 선택하세요.
- 원하는 해상도를 선택해주세요.
※ 모바일에서 Wifi가 아니라면 데이타가 소진될 수 있으니 주의바랍니다.
Premiere & Effe…님의 Adobe Premiere & Effects강의 청각장애인을 위한 자막
your head
hey what's up you guys it's premier gal
here and in this tutorial I'm going to
show you how to recreate this kinetic
typography effect so you can begin
making your own lyric videos and
Premiere Pro so to get started I have a
new sequence here with the music clip in
the timeline already you'll notice that
I have markers on the clip I place a new
marker each time the beginning of a word
is sung by the artist by the way this
song is called electrocute me and it's
from sound stripe calm which is an
awesomely inexpensive stock music
company just fifteen dollars per month
for unlimited music and you can get 10%
off with my code gal 10 I've included a
link in the description box below so
back to the tutorial if you don't know
how to make markers on an audio clip
just select the clip on the timeline
position your current time indicator
which is the playhead at the moment you
want to make the marker and then hit M
so first I'm going to make a color
background for the lyric video I'm going
to go to the project panel and create a
color matte layer I'm going to choose a
yellow color then I'm going to drag this
color matte into the timeline as my
background you don't have to have a
color background you can have a video or
an image or anything that you like so
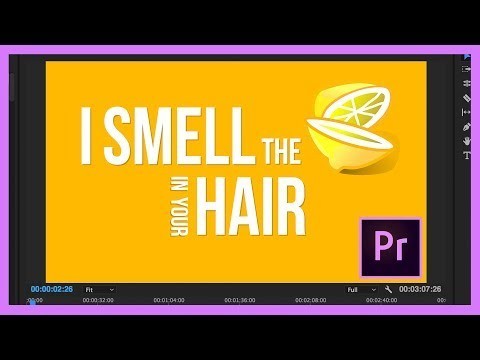
now it's time to add our text and lemon
using the essential graphics panel so
first hit T on your keyboard to activate
the text tool I use the font beb챕s new
and added a drop shadow by checking the
box next to shadow in the essential
graphics panel then just click on the
program panel to type out the words so
I'm just going to quickly type out and
add my assets and then later I will
resize and arrange them nicely so first
I'll type out I then smell and then the
word the and next I'm going to actually
click on new item icon from the
essential graphics panel to import the
lemon file which I got from pixabay.com
it's a free public domain graphic and
I've
could add a link in the description box
below now I'm going to select the type
tool again to type out the word n then
the word your and then the word hair you
will now see that there is one graphics
layer in the timeline and this graphic
layer holds all of the different assets
which are represented each by one layer
so each word and the lemon has a layer
inside of the essential graphics panel
kind of like Photoshop so now I'm going
to use the selection tool to reposition
the text into the place I like all I
have to do is just click and drag it
into place it's that easy and now I'm
going to resize the word duh to be
smaller by changing the font size in the
essential graphics panel I can also
rescale the lemon graphic by just
grabbing a corner and moving it inwards
to make it smaller or moving it outwards
to make it bigger so that's looking
pretty good
next I'm going to rotate the in and the
your word by making the rotation 90 for
both so that way they will line up
nicely to the hair word vertically now
I'm just going to select and reposition
them so they line up a little bit better
and that's looking good so now it's time
to make each word appear when the lyric
is spoken let's drag this graphic to the
first marker which represents the word
eye and make sure the snap tool is
turned on so we'll line up and snap
flush to the marker so with our current
layer that we have we just want the eye
text to be turned on so let's go ahead
and check the eye icon next to each
other layer to turn them off now it's
time for the word smell so we have to
duplicate this layer just hit and hold
the alt option key and then select and
drag the layer up and release to
duplicate the layer now drag this new
layer to the second marker which
represents the word smell now in the
essential graphics panel turn off all
the layers except for the smell layer
now we're going to repeat hit and hold
the alt option key select and drag up
the layer to duplicate it
and now reposition it to the third
marker which is the word now in the
assemble graphics panel turn off all the
layers besides the word so we're just
going to repeat this quickly until I
finish all of the layers so now that
I've created a new layer for each word
in graphic and repositioned it to the
lyric markers when I play it back you
will see that the text and graphics
appear and animate to the lyrics
so next and this is completely optional
but you can add some further effects to
make each layer more dynamic the words
smell and hair in the music are more
drawn-out
so we can add a wipe effect to these
words simply search for wipe in the
effects panel and drag and drop the
effect at the beginning of each clip now
when I play it back you will see that
they wipe on screen rather than up here
you can of course make further
refinements such as along gating or
shortening the effect to match the music
better you just have to play it back and
adjust until you get it right you can
certainly keyframe each text layers well
if you want them to animate in from
off-screen to their current location but
in this tutorial I just want to show you
guys that kinetic typography
is absolutely possible in Premiere Pro
and you don't need After Effects to
achieve the effect so I hope you guys
found this useful and if you did give it
a thumbs up and please subscribe and if
you guys want to help me out you can
head over to patreon.com select premier
gal to leave me a monthly tip thanks
again you guys and I'll see you all next
week with a new tutorial byte
you
댓글 0개
등록된 댓글이 없습니다.