

Premiere & Effe… | How to Clone Yourself Adobe Premiere Pro Tutorial
본문
※ 영상을 선명하게 보기 안내
- 유튜브 영상에서 오른쪽하단에 톱니바퀴를 클릭합니다.
- 팝업목록에서 "품질" 선택하세요.
- 원하는 해상도를 선택해주세요.
※ 모바일에서 Wifi가 아니라면 데이타가 소진될 수 있으니 주의바랍니다.
Premiere & Effe…님의 Adobe Premiere & Effects강의 청각장애인을 위한 자막
This video is made possible by the
support of Squarespace I use Squarespace
for PremiereGal.com with the website
I'm able to easily drag and drop new
logos such as my Pride Month logo to
celebrate pride and you can save now
the logos up to date I also keep all of
my gear up to date just by dragging and
dropping images and adding links with
just a click of a button
and you can go to Squarespace.com/PremiereGal and get 10% OFF to get
started to make a site to promote your
own YouTube channel and it will give you
lots of templates to start from and now
here's the tutorial on how to clone
yourself in Premiere Pro
Hey Everybody and welcome back to
Gal in this video I'm going to show you
how I clone myself
why just fast forward
so first off why
would you even want to clone yourself
well cloning has been done by many
acapella musicians like Mike Tompkins
for doing cool music videos showing how
he plays multiple instruments and also
in Hollyd such as Parent Trap where
Lindsay Lohan was duplicated to make it
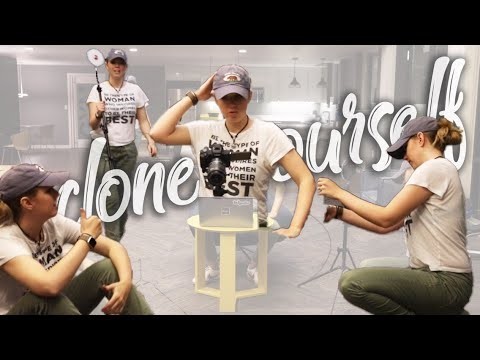
look like she had a twin now to clone
myself I use a tripod to fill myself in
four different locations doing 4
different things so you see here I'm
setting up the lights in different
locations and I'm not crossing paths
with the other
Gals in the scene so then I got four
different shots recorded with the tripod
and this is what they looked like all
next to each other here but then the
next step is to take this into Premiere
Pro and then add a mask to each layer to
produce this awesome effect so let's go
ahead and jump on in
so just to break it down here I film
this all in one take and I just chopped
it up and stack them on top of each
other so you have video layer one two
three and four so right over here if I
turn off video layer four you can see
that I go away if I turn off video layer
three the Gal on the Left disappears
and if I turn off video layer two I
disappear on the right and then the main
video clip is me coming to sit down
which is the base clip so I come in the
screen here then video layer two is on
and what I did is I created an opacity
mask so you can see the mask that I
created over here so I basically only am
showing this part of the frame so that
way I don't cut over top of me sitting
here in the chair now let me turn on
video layer three same thing opacity
mask but on the right so you can see I
have a mask around me here on the left
and then over here if I turn on this
layer this is a little bit more complex
of a mask because I had to go around
this light here you click on this you can
see what that looks like so let's go on
over here to the demo and you can see I
have all four Clips here stacked on top
of each other but we have to get started
here so you see if I turn off all these
layers
it's just me sitting there so I come
into frame and I sit down now let me
turn on the second layer here and this
is me walking and frame on the right so
I'm not here I need to draw a mask
around me so to do that what I'm going
to do is just select video layer two and
then go up to opacity and select the pen
tool and I'm just going to click click
click click and click
now this one's pretty easy mask because
there's not too much intersecting going
on there is a moment where my hand
reaches out so see right here I just
have to be careful that my hand doesn't
overlap here because what happens if I
go like this you can see it cuts off my
hand in my body so you got to keep it
over here but also make sure that this
light stand is fully there all right so
that mask is done and that looks good
you can also add a little bit of
feathering around the mask so that way
it blends in better so if I click off
you can see you don't see the mask at
all if I click back on and I don't add
any feathering on the mask its zero you
can see there's a little bit of a line
there it's very settle but just so it
blends in I highly recommend adding in a
mask so it just blends in much better
all right so this mask is done now let's
go to video layer 3 and I need to add a
mask go to opacity click on the pen
tool and I'm just going to click click
click click and click alright so now we
have this mask and you can reduce this
down to 50% so you can bring it off
screen like so and that should work so
then you just fit and now you can also
add some feathering as well just a
little bit and now we have three of the
Gals here so now when we play it back
and kind of scrub through you can see
that there's a problem here so what
happened is is that this layer here
comes in too early because it's cutting
me off below so to fix that I'm just
going to shift it over so when I come
into frame here and I sit down that's
when this layer of me coming in on the
right can come in so I can roll this
edit back and
move this over and so there we go
we're in scene so then the last clip we
turn it on this is where I just come in
at the last minute so as I come in over
here on the right I'll just roll this
edit back and then I'll create a mask
and then we can refine it so let's go up
to effect controls go to opacity and
then just quickly draw a mask around
here and once I close the mask you'll
see me appear in the other scenes
because these exist below this okay so
what we need to do now is make sure that
this mask goes directly around this
light so it doesn't cut it off so this
is where i zoom into a 150%
and I hit the alt/option
key to make this rounded like so and
really get this as close as possible
around the edge here and then we can
scrub through just to make sure that my
shoes don't get in front of the mask so
then here that works and then just here
my foot gets cut off so we need to drag
that down like so until my feet are in
the shot and you can add another point
just so my hand doesn't get in the shot
so that's how we did the last one and
then we're done we have four different
masks for different Gals in the scene
and this is the final effect
so I hope that you guys enjoy this
awesome tutorial and put it to practice
and start cloning yourself for your next
project if you guys have any questions
at all sure to leave a comment below I
like to see what you guys say
so be sure to do that and also give this
video a thumbs up if you like this type
of tutorial if it gets to a 1000
likes that would be super cool and if
you guys want direct message support or
some templates that I design myself each
month you guys can head on over to
Patreon.com/PremiereGal and become a
patron so that's all for this video and
I'll see you guys next time bye
댓글 0개
등록된 댓글이 없습니다.