

bicycle repair … | How to build a kicker ramp for BMX or MTB
본문
※ 영상을 선명하게 보기 안내
- 유튜브 영상에서 오른쪽하단에 톱니바퀴를 클릭합니다.
- 팝업목록에서 "품질" 선택하세요.
- 원하는 해상도를 선택해주세요.
※ 모바일에서 Wifi가 아니라면 데이타가 소진될 수 있으니 주의바랍니다.
bicycle repair …님의 Bicycle Repair Tips강의 청각장애인을 위한 자막
Today, we’ll be building a multipurpose
ramp which can be used for a BMX or mountain
bike.
My friend James is helping out with his truck
and workspace
Our ramp will be made from just one piece
of 1/2” plyd and some 2x4’s.
Including the screws, the materials are only
about $50.
I’m spending slightly more for pressure
treated d and stainless deck screws, just
to make the ramp more resistant to the outdoors.
With normal d it’ll be just as sturdy.
First we’ll draw the profile of the ramp
on the plyd.
My ramp has some curve to it, so we’re using
a PVC pipe to trace a smooth bend.
Once we’re done tracing the shape, we’ll
cut it out with a jigsaw and use it as a template
for cutting another piece.
These pieces will become the sides of the
ramp.
The rest of this d will be used for the
riding surface, but first we need to cut a
bunch of support beams from the 2x4’s.
These should be cut to the width you want
your ramp to be, but we’ll need to make
them slightly shorter to account for the plyd.
You’ll see why in a minute.
Next, we’ll use our beams to frame out the
ramp.
We’ll fasten them in place with two deck
screws on each side.
Once the ramp is framed out, we’ll cut the
faces from the remaining d.
We’re cutting some extra angles and sanding
for a tighter fit, but this part won’t make
or break anything.
The faces get attached with screws, just like
the beams.
Since the curvature of the ramp is really
mellow, the plyd easily bends into place
when you screw it in.
We’re also making sure these screws are
buried real good so they can’t stick out
and become a hazard.
I’m going to need to stencil my channel
logo on here, but one thing at a time.
As you can see, we measured the beams so that
the face would hang over the edge slightly.
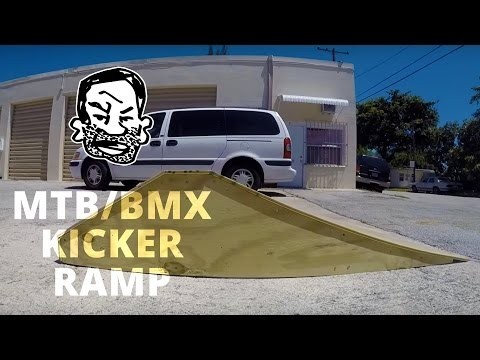
This ramp should hold up to everything from
oversized riders to crashes.
Although it’s small, it’s really fun.
I can’t ride on it here for long, so let’s
pack up and go someplace else.
At just 6 feet long, this kicker ramp could
fit in the back of an SUV, although it’s
probably a two person job.
If you’re just dragging it around it’s
not too bad.
For absolute beginners, this ramp provides
a few challenges and plenty of room for growth,
but the back side makes it possible to roll
over without jumping it.
Riding the ramp the opposite way is great
practice for getting over obstacles and learning
to bunny hop.
On a BMX, you can get creative with nose bonks,
manuals, and all sorts of fun stuff.
We could have made this back side go all the
way to the ground, but the 4” drop makes
it a lot more interesting.
If you want to build this exact ramp, there’s
a link in the video description with a materials
list and measurements.
What I really want you to get from this video
though, is a starting point to design your
own ramp.
Your ramp can be bigger, smaller, wider, or
have a totally different shape.
You can even add handles, wheels, or a custom
paint job.
A piece of sheet metal at the bottom can even
make it work for skateboards.
The best part is that a custom ramp could
cost less than one mountain bike tire.
Most home improvement stores can even make
the big cuts on site, so you can bring the
lumber home in your Toyota Corolla.
What do you guys think?
How can we improve this ramp without making
it bigger or more expensive?
Give the newbies some inspiration by sharing
your ramp building tips in the comments.
Thanks for riding with me today and I’ll
see you next time.
댓글 0개
등록된 댓글이 없습니다.