

bicycle repair … | Let's build a wheel with no tools!
본문
※ 영상을 선명하게 보기 안내
- 유튜브 영상에서 오른쪽하단에 톱니바퀴를 클릭합니다.
- 팝업목록에서 "품질" 선택하세요.
- 원하는 해상도를 선택해주세요.
※ 모바일에서 Wifi가 아니라면 데이타가 소진될 수 있으니 주의바랍니다.
bicycle repair …님의 Bicycle Repair Tips강의 청각장애인을 위한 자막
Arguably the most specialized area of bike
repair is wheel building.
You need to know about spoke types, spoke
lengths, hubs, rims, rim sizes, lacing, truing,
dishing, and a variety of measurements that
would make your head spin.
Not to mention the expensive specialty tools
like truing stands, nipple drivers, spoke
wrenches, and dishing gauges.
It’s no wonder that some bike shops outsource
their wheel repair to specialists.
Just carrying the parts is a challenge.
To me, wheel builders are like heart surgeons.
So, I came up with a terrible challenge: Swap
a rim with no specialty tools other than a
spoke wrench.
We’re not starting with a pile of parts
though.
I actually do have a bent wheel here which
needs a new hoop.
First we’ll remove the brake rotor to expose
the side of the hub.
I said I’d only use a spoke wrench, but
I don’t think a torx driver counts as a
wheel building tool.
In an attempt to make my life slightly easier
I’m tying all these spokes together with
string.
For an experienced mechanic this wouldn’t
make things easier at all, but for me it takes
the complexity out of lacing the wheel back
up.
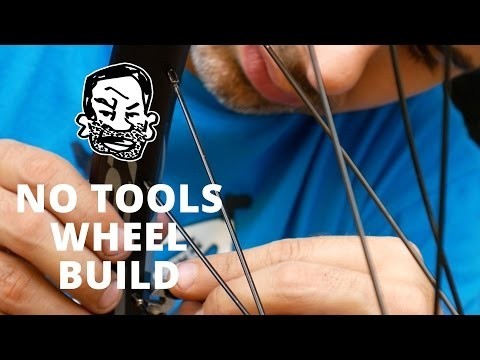
Now I’m removing all of the spoke nipples,
which would be way way easier with a nipple
driver.
I feel like my hand is going to fall off and
I haven’t even started fastening the new
rim.
You can sorta use a screwdriver for this,
but it doesn’t have the little point in
the middle that keeps it centered.
It’s harder than you would think.
Now to lace the new hoop on.
Even with the spokes tied together this is
not easy.
In fact, I almost wish I left the string off.
This part of the process wouldn’t have been
too bad, but I got a few of the nipples stuck
inside the rim.
To get them back out, some wheels are worse
than other.
A few times I considered just sawing the rim
open and quitting mountain biking.
I tried tweezers, magnets, you name it.
The only thing that works is shaking the wheel
for 20 minutes and hoping for a miracle.
Now that I have all my hardware back, the
wheel is at least put together.
Now it needs to be trued so that all of the
spokes have even tension.
Since I’m doing this with no tools, I’ll
use the front fork and some zip ties.
If you’ve never trued a wheel before, it’s
basically a matter of finding the biggest
bow in the wheel, tightening the spoke on
the opposite side of it lightly, and then
repeating the process until the wheel is straight.
Although it might look straight, we still
need to align this rim with the hub laterally.
This part is called dishing.
Dishing is normally done with a gauge, or
even a properly calibrated truing stand.
Since I don’t have either, I’ll be using
a trick I saw on a forum.
Basically, I’m setting a reference point
on one side of the wheel, flipping it over,
and making sure the hub face is the same distance
from the rim on both sides.
It’s not.
It’s off tremendously.
Because it’s off by so much, I’m going
to tighten every spoke on the right side,
and loosen every spoke on the left side one
half turn.
30 minutes later and a couple more passes
around the wheel, and I’m as close as we’re
gonna get with my homemade precision dishing
gauge.
One more tedious truing and we’re finally
done.
That took me over 3 hours and I regret it
thoroughly.
There’s a little jump in the rim too.
It won’t be noticeable while riding, but
I’ll know it’s there and it’ll bother
me.
There are scratches all over my brand new
Easton Arc rim, and the nipples look like
they’ve been through some kind of S&M clamping
ritual.
I don’t know what tool I missed the most.
Obviously the truing stand would have helped,
as a properly calibrated one can pretty much
do the whole job.
Not only that, but it provides a nice mount
at eye level for working on the wheel.
The other part that killed me was not having
a nipple driver.
If you’ve ever smashed your hand in a car
door, then you know what it feels like to
build a whole friggin wheel with just a spoke
wrench.
Let’s also consider that I was building
a front wheel, which is easier than a rear
since it’s pretty much centered over the
hub.
A rear wheel is offset even more to account
for the cassette, so my terrible experience
was actually the best case scenario.
I could have used really nice tools, and the
help of an experienced mechanic, but I thought
this video would be useful those who wanted
to save a few bucks.
Actually, how many bucks are we saving?
$35?
Ugh…
Even if your local shop charges twice this,
I can’t recommend doing it yourself without
the proper tools and knowledge.
The risk of you screwing it up and costing
yourself more money is just too great.
I hope that at least, this was worth the entertainment.
Thanks for riding with me today, and I’ll
see you next time.
댓글 0개
등록된 댓글이 없습니다.