

bicycle repair … | How to repair or replace a MTB chain
본문
※ 영상을 선명하게 보기 안내
- 유튜브 영상에서 오른쪽하단에 톱니바퀴를 클릭합니다.
- 팝업목록에서 "품질" 선택하세요.
- 원하는 해상도를 선택해주세요.
※ 모바일에서 Wifi가 아니라면 데이타가 소진될 수 있으니 주의바랍니다.
bicycle repair …님의 Bicycle Repair Tips강의 청각장애인을 위한 자막
Today, my bike is looking fly with a brand
new gold chain.
I installed this today because my old chain
snapped at the bike park.
Thanks to the help of a chain tool, I was
back up and running.
So why did I replace my chain if it was fixed?
More importantly, how did I fix my old one?
Today we’ll be talking about all of this,
but first let’s take a look at some of the
tools we use to work on chains.
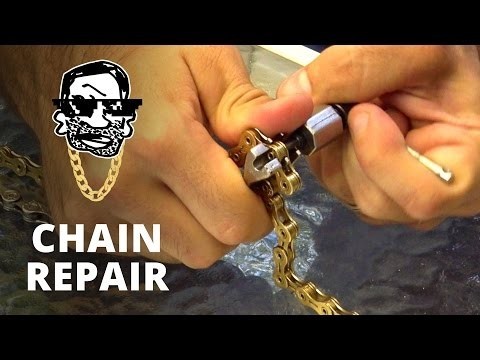
This is a chain tool, or chain breaker.
The spot on the end is for removing and joining
links, while the spot at the back is for loosening
tight links.
To pop a link out, line it up at the end and
crank down on it—carefully of course.
A good chain breaker is measured to stop short
of pushing the pin all the way out, but I
recommend playing it safe and not going all
the way to this point.
To join a link, put the chain in the opposite
way and line up the pins.
Of course, you need to stop pushing when the
pin reaches the end.
When you join a link, it’ll sometimes be
tighter than the others.
Use this part of the tool to push on the pin
very slightly, which will loosen it up.
Since popping links in and out can weaken
them, most chains have a master link for removal
and maintenance.
While there are special pliers made to pop
these out, I don’t think most people have
them.
Most master links can be popped out by hand,
and stubborn ones can be popped out carefully
with pliers by squeezing the link end to end.
Through normal use, chains actually stretch
out a bit.
Eventually they don’t line up perfectly
with your gears, and cause wear on your drivetrain.
If you have good parts on your bike, it’s
cheaper and easier to replace your chain every
so often, than to get a new cassette, chainring,
and set of derailleur pulleys.
You could use this gauge to tell if your chain
needs replacement, but just doing it on a
schedule is better than nothing.
For an average or casual rider, I’d recommend
doing it at the beginning of each riding season.
If you race, have expensive parts, or are
particularly abusive, it may be a good idea
to do it a few times per season, maybe even
invest in a gauge.
So, let’s apply what we’ve learned with
a real life scenario.
You’re out on the trails and this happens.
If you’ve never snapped a chain before,
let me tell you it isn’t pretty.
Your drivetrain suddenly goes limp, which
can cause you to crash or smash your knee
on the frame.
At this point you’re either planning your
long walk back to the trailhead, or reaching
for your trusty multi tool.
Brands like Park, Topeak, Crankbrothers, and
Lezyne, just to name a few, have chain breakers
built right into their multitools.
While these are usually kinda clumsy to use,
they’re better than nothing.
First let’s take this broken stuff off the
chain.
To join the chain, you can see here that we
need to remove one more segment.
Now we’re in business.
Even though this chain is now short by one
link, your derailleur just needs to reach
forwards a bit to make up for it.
To get home, this is fine, although you should
replace your chain as soon as possible.
After all, if you snapped your chain in the
first place it probably needs to be replaced.
Plus, at one link short you’re putting extra
stress on your derailleur and drivetrain.
When reinstalling a chain, you’ll need to
route it through the derailleur.
If you’ve never done this before, it might
be confusing, but you can always look at a
friend’s bike for reference.
Just start at the back of the cassette, route
it in front of the upper pulley, and behind
the lower pulley.
Go around your front chainring, or even your
bottom bracket to join the chain together.
If you’re replacing your chain you can always
line it up next to your old one for size.
If you repaired it out on the trails, just
add an extra link to make up for the one you
removed.
If you don’t have your old chain, then measure
it up so that your derailleur is angled slightly
forwards in your lowest gear.
Don’t go more than 45 degrees as this is
probably going to be too short.
Oh yeah one more thing… if you have gears
up front, be sure to shift them into the largest
ring while measuring.
So, what to do with your old chain?
I say, use it for practice.
You can even make a keychain.
The practice will come in handy the next time
you find yourself stranded miles from home.
Thanks for riding with me today and I’ll
see you next time.
댓글 0개
등록된 댓글이 없습니다.