

bicycle repair … | Suspension fork settings - What they mean
본문
※ 영상을 선명하게 보기 안내
- 유튜브 영상에서 오른쪽하단에 톱니바퀴를 클릭합니다.
- 팝업목록에서 "품질" 선택하세요.
- 원하는 해상도를 선택해주세요.
※ 모바일에서 Wifi가 아니라면 데이타가 소진될 수 있으니 주의바랍니다.
bicycle repair …님의 Bicycle Repair Tips강의 청각장애인을 위한 자막
Changing the settings on your suspension has
a huge affect on your bike’s performance.
You can make it more plush, responsive, or
playful.
A lot of these settings are fast and easy,
while some take some more time.
Today, we’ll do a basic overview of the
most common settings and what they do—specifically
the ones you’ll find on an air fork.
The first setting that most riders are familiar
with is air pressure, which you’ll set with
a shock pump.
Most forks come with a guide which is based
on rider weight, but that won’t give you
a perfect result.
For that, you’ll need to adjust your sag.
When you sit on your bike, your fork compresses
a little bit, or at least it’s supposed
to.
This is sag, and it’s expressed as a percentage
of the forks total travel.
Most trail and XC forks ride best with between
20% and 35% sag, but you should check with
your manufacturer.
The longer your travel, the more sag you’ll
likely need.
You can determine your sag by sitting on your
bike with all your gear on, and pushing this
ring to the bottom.
When you get off, the position of the ring
will indicate your sag.
The Pike even has a guide printed on the stanchion
to make things easier.
More sag makes your suspension feel plush,
which helps you maintain control on chunky
terrain.
Less sag can make your fork more responsive,
but that’s only beneficial when the terrain
is more moderate or flowy.
If you like riding street, for instance, you
can get away with very little sag.
Even with proper sag, aggressive riders will
sometimes find themselves bottoming out.
Naturally they add more pressure, which works
at the expense of ride quality.
There’s a better way.
These are called volume reducers, or tokens.
The more of these you have in your fork, the
less room there is for air.
This makes your fork stiffen up towards the
end of its travel.
You’ll hear people call this “progressive”
travel.
The opposite would be “linear travel”.
Linear travel, or no volume reducers would
look like this.
Green indicates the part of the fork’s travel
that’s real supple and squishy, while red
indicates firmness.
As we reduce the volume, or add these expensive
pieces of plastic, the travel becomes more
progressive.
Reducing your forks volume is easy.
Just order the right reducers for your fork,
let all the pressure out, and install them
on the top cap.
Reinstall the cap and pump the fork back up
to pressure.
If you’re still bottoming out, reduce the
volume more by adding more of these tokens.
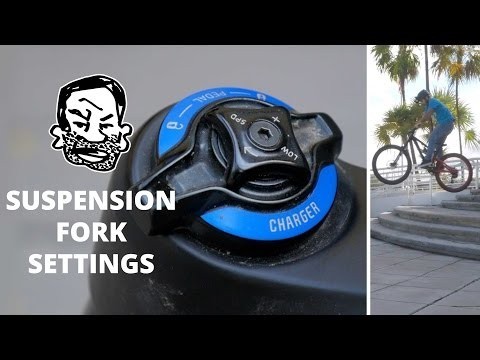
The next setting is the damper, or compression.
You might know this dial as a lockout, or
the Charger on the Pike.
Simply put, compression controls how much
the fork resists traveling.
This can usually be done on the fly.
Before a long climb, cranking this up provides
a stiffer pedaling platform.
For descending, you want it open so that it’s
extra squishy.
When you’re doing a lot of pedaling on flat
terrain, the middle setting can offer a balance
between pedaling and shock absorption.
A lot of forks, have a low speed compression
setting.
This affects how it responds to braking, and
small bumps.
If you find that your bike bobs around a lot
while pedaling, or dips too much while braking,
you might want to dial this up a bit.
Don’t turn it up more than you need to though,
as you still want your fork to absorb little
bumps.
Now for one of the most talked about settings,
rebound damping.
This controls how fast your fork returns after
compressing.
Close it up and your fork will return slowly.
Open it up and it’ll return quickly.
I think a good way to set your rebound is
to open it all the way and ride off some stuff.
Are you getting bucked around when the fork
returns?
Close it a few clicks to reduce the rebound
speed.
You’ll find that slower rebound makes drops
feel really nice, but crank it up too much
and it won’t return fast enough for the
next bump.
Personally, I like my rebound on the faster
side since it makes for a more responsive
and playful ride.
So now that we have a basic understanding
of the settings on your fork, let’s have
some fun.
We’ve seen a few clips of this guy throughout
the video, and some of you might recognize
him.
Meet Clint Gibbs, a fellow YouTuber who races
XC and Cyclocross.
Today, he was able to clock a time of 2:58
seconds on this course here at Santos.
I thought it would be fun to max out his compression
and rebound and record his time again.
First we cranked the compression all the way
up, which makes the fork all but locked out.
When sprinting and climbing, this would have
been a benefit, but this course gets pretty
chunky in some sections.
For Clint, it was harder to maintain control
in the rough sections, and transfer power
to the ground efficiently.
In the end, he fell short of his fastest time
by a full 9 seconds.
That’s a lot for such a short course, which
shows how much of an advantage suspension
really provides.
Next, we closed up his rebound as much as
it would go.
Pretty hilarious actually—Fox lets you close
the rebound to a ridiculous level.
This would be interesting.
Surprise surprise, Clint got the same time
as he did in the fully locked position.
With a slow rebound, your suspension doesn’t
have enough time to set up for consecutive
bumps.
So, it keeps sinking lower and lower into
its travel until it finally bottoms out.
So, what about fully open?
In this setting, there’s nothing stopping
the fork from returning.
Like we saw this can make the bike too bouncy,
and buck you around, but it didn’t have
much of an effect on Clint.
His time was 2:59, only one second slower
than his fastest lap.
So let’s say you’re dialing in your rebound
and trying to decide between a click or two
either way.
According to our test, you might want to give
the faster setting the benefit for the doubt.
So, there you have it.
My goal was to explain these settings without
giving you information overload, but I know
a lot of you guys like to get into more detail.
For that you might want to check out Clint’s
channel.
He does long form discussions on all sorts
of stuff, like XC, Cyclocross, geometry, you
name it.
I left some links to his videos in the description,
as well as some charts, articles, and parts
you can use to adjust your suspension.
So before you ask me where to get volume reducers,
check the description.
One thing I’d like to mention is that you
can apply most everything we discussed today
to your rear shock.
We’ll go over the specifics of that another
time, but for now I’d like to know about
your setups.
Leave a comment explaining how you like your
suspension to feel, and why.
By the way, for all the beginners who have
been asking what the settings are on my Pike,
here you go: Average sag, low volume, fast
rebound, and very little low speed compression.
That’s as specific as I’m going to get
because telling you exact PSI and clicks would
totally undermine the point of this video.
I want you to go out and dick around with
your settings.
You might learn something.
Thanks for riding with me today, and I’ll
see you next time.
댓글 0개
등록된 댓글이 없습니다.