

bicycle repair … | 5 Tire Sidewall Repair Hacks, Tested
본문
※ 영상을 선명하게 보기 안내
- 유튜브 영상에서 오른쪽하단에 톱니바퀴를 클릭합니다.
- 팝업목록에서 "품질" 선택하세요.
- 원하는 해상도를 선택해주세요.
※ 모바일에서 Wifi가 아니라면 데이타가 소진될 수 있으니 주의바랍니다.
bicycle repair …님의 Bicycle Repair Tips강의 청각장애인을 위한 자막
Even if you ride a mountain bike with tubeless
tires, you’re not immune to sidewall tears.
To get home, you would need an inner tube,
and something to brace the tear.
In all cases, significant damage is a death
sentence for your tire.
Anything you do to fix it is a hack designed
to get you home.
A few weeks ago, Alex and I used a rubber
patch and some Gorilla tape to fix the sidewall
on his road bike.
We lucked out, and got to a bike shop 35 miles
away in Key Largo.
We had our jankey sidewall repair to thank
for that.
Today, I’m replacing the front tire on my
BMX and destroying my old one in the name
of science.
We’ll test these 5 hacks from 30 all the
way to 120 PSI.
First we have duct tape, labeled T for tape.
Alex and I did have this with us during our
trip.
Next we have a standard rubber bike patch,
labeled P. This is for patching inner tubes
and is held on with rubber cement.
Alex and I also had this during our trip.
Next, a glueless patch.
To me this would be a last resort since it’s
not very rigid.
It’s labeled G for glueless.
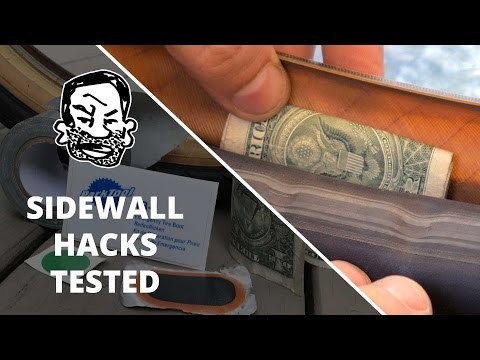
Then we have a dollar bill.
This is a well known hack, which I’ll demonstrate
in this video.
Then finally, we have a Park Emergency Tire
Boot which is made for sidewall repairs.
I labeled it B for boot, but changed it to
R for Reifenflicken!
It seems that our German friends have a dedicated
word just for tire patches.
Now to make some tears in the sidewall.
I’m using a sharp file from my multi tool,
as sidewall tears are jagged in real life.
Using a blade wouldn’t give us a realistic
tear.
I’m making an effort to place and tear these
5 holes as equally as possible.
Now let’s pump up the tire a bit and see
what they look like.
So you can see here that the inner tube starts
to bulge out and becomes vulnerable.
It also puts pressure on the tear, which could
cause it to rip more.
All the holes are about equal except for the
one for the glueless patch.
I don’t expect that to be very effective
anyway so we’ll just have fun with it and
see what happens.
First let’s install the tape.
Realistically anyone doing this repair would
have a little role of it, and likely put a
few layers on.
I’m making sure the tape is nicely spread
out as to really hold the sidewall together.
Next, the patch.
This is how we repaired Alex’s tire and
it held us over.
The patch feels really sturdy and the rubber
cement holds it on quite well.
I have high hopes for this.
Then, the the Reifenflicken, or Tire Boot.
This is really sturdy and adheres impressively
to the sidewall.
I also have high hopes for this.
Then the glueless patch.
I’m sure this will give out first, as it’s
pretty anemic and patching a slightly larger
hole than the other methods.
Now, I’m mounting the tire and pumping up
the tube a little, so I can slide a rolled
up dollar bill in for the final hack.
This needs to be done while mounting the tire
in order to stay in place.
Now for little pressure.
let’s do 30 PSI and take a look at our repairs.
We can see the dollar bill is firmly in place,
and although the tear can flap open freely,
there’s no bulging or signs of stress on
the sidewall.
The tire boot is holding up quite well, as
I would expect it to.
So is the patch, although there are some signs
of stress on the sidewall.
Maybe that’s because the patch is rubbery
and allowed to stretch.
Then we have the tape which looks pretty good,
and the glueless patch which looks like it’s
ready to blow.
Let’s bump the pressure up to 60 PSI and
check these again.
Now things are getting a little interesting.
The tape is now showing some signs of stress,
as we can see by the deformation in the tire.
The patch is as well, although surprisingly
not so much worse than it was at 30 PSI.
The glueless patch is just hanging on by a
thread.
The dollar is clearly visible through the
hole, which is now stressed a bit more.
Still there not that much deformation.
The tire boot is about the same.
The hole does look stressed but the tire isn’t
really deformed or bulging out.
So far, the boot and the bill are in the lead.
Let’s bump it up to 100 PSI, but first let’s
take the glueless patch out and replace it
with a reifenflicken/Tire Boot.
If we leave it as is and this thing tears
wide open the experiment will be over.
What a like about this boot is that it covers
a wide area and really stays in place.
We have yet to see if it performs better than
a dollar bill though.
Now to give it hell.
100PSI.
Alright, it looks like the tape is stressed
pretty bad, but still not bulging terribly.
In terms of deformation the patch is doing
bad.
You can clearly see the bulge in the tire
and it’s only a matter of time before it
leads to something worse.
Now this was the big glueless patch hole which
we replaced with a tire boot, and although
the hole easily flaps open, there’s barely
any deformation in the tire.
The smaller hole looks about the same.
It’s obviously stressed around the tear,
but it’s not bulging.
Then we have our one dollar bill, which is
performing every bit as good as the tire boot.
This hack keeps surprising me, because it’s
just sitting there bracing the hole.
Wow, just wow.
A hack that actually works.
What the hell.
All of these look manageable so let’s step
it up to 120 and see what happens.
The tire boot is clearly stressed now but
still not showing any signs of significant
bulging.
The same goes for the bigger hole.
Although the tear is stressed it’s not bulging
all that much.
The tape is quite deformed, and looking pretty
scary.
My recommendation would be to use 4 layers
of tape if you’re doing this.
Maybe 5.
The patch is bulging worse than any of the
other hacks, and clearly it’s hanging on
for dear life.
I’d only recommend this as a last resort.
And finally the dollar.
The more I look at this the more it looks
like the dollar got the luck of the draw in
terms of holes.
But upon closer inspection, it’s just a
good hack.
There’s a reason why so many people will
tell you this has gotten them home.
Do we have reason to believe that this would
perform any better than another rolled up
peice of paper?
Well yes.
Currency is made of very good material which
resists moisture, handling, and all sorts
of stress.
On a big tear I’d be more inclined to use
the boot since it sticks in place, but man
the case for the dollar is pretty strong.
What do you guys think?
I know this experiment was far from scientific
and the holes were far from perfect, but the
results were interesting enough to warrant
some more testing.
What would you like to see?
Have you used any of these hacks to get home
before?
Thanks for riding with me today, and I’ll
see you next time.
댓글 0개
등록된 댓글이 없습니다.