

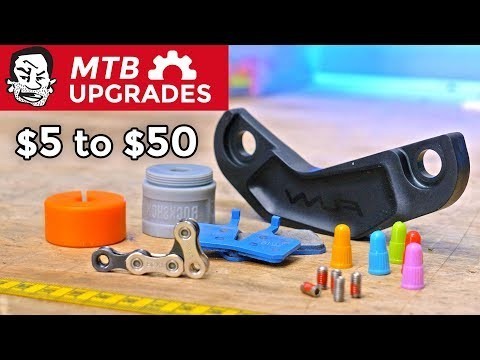
bicycle repair … | 11 Super Cheap MTB Upgrades
본문
※ 영상을 선명하게 보기 안내
- 유튜브 영상에서 오른쪽하단에 톱니바퀴를 클릭합니다.
- 팝업목록에서 "품질" 선택하세요.
- 원하는 해상도를 선택해주세요.
※ 모바일에서 Wifi가 아니라면 데이타가 소진될 수 있으니 주의바랍니다.
bicycle repair …님의 Bicycle Repair Tips강의 청각장애인을 위한 자막
For many of you, your mountain bike is the
love of your life.
Even if it put you in the toilet financially
or caused you injury, it’s also given you
freedom, confidence, and joy.
So you want to tend to and pamper your mountain
bike, but you have no money left to do it.
I’ve got you covered today.
We’re gonna look at a whole bunch of inexpensive
things you can do to your bike to make it
work better, look better, and last longer.
The stuff we’ll be looking at is so cheap
that tires don’t even make the cut.
Let’s get started.
If color coordination is important to you,
plastic valve caps are the cheapest way to
do it, hands down.
These are available in an absurd amount of
colors, and I could just eat them.
In another video I tried aluminum caps, but
they do get kind of crusty over time.
This doesn’t happen to plastic, and they’re
available in way more color options.
Of course, you can only expect to get tops,
a 5% performance gain from installing these
on your bike.
If you run flat pedals and ride hard, these
pins will eventually become unrecognizable.
Replacing them with new stainless steel pins
will restore your pedals to their original
glory—if you can get the old ones out.
I’ve used everything from vice grips to
screw extractors to get the job done, and
the whole process is an oddly satisfying endeavor.
Most popular pedals seem to take this exact
pin, but I have a link to a variety of them
below.
At the end of your shift cable is an end cap
to protect it, and these can actually be upgraded
with anti kink end caps from Jagwire.
Like the extension cord on a vacuum cleaner
they provide support a little ways up the
housing to prevent kinks, which can impact
your shifting performance.
As long as you know how to adjust your derailleur,
these are pretty easy to install, and they
add a bit of longevity to an otherwise vulnerable
part.
So you adjusted the sag on your suspension
and your bike is riding smoothly.
But when you hit a big drop it bottoms out.
Don’t add air, add progression.
We covered this in detail in another video
which I’ve linked below, but in short, reducing
your fork’s air volume with these little
spacers will make it more supportive deep
in its travel.
Volume reducers don’t cost much, and they’re
very easy to install.
As far as cheap upgrades go, this is one of
the biggest if you’re an aggressive rider.
Something like an MRP ramp control cartridge
accomplishes the same effect, but it’s not
even in the same universe in terms of cost.
If you remove your front wheel often, you
appreciate the convenience of a quick release
thru axle.
If not, you don’t need it, these stealth
axles are much better.
They’re simpler, lighter, lower profile,
better looking, and in many cases more secure.
If your front wheel stays on most of the time,
this is a no brainer.
Just make sure you do a little googling to
get the right one for your fork, and keep
a multi tool on hand in case you do need to
remove your front wheel.
If your bike has these little threads under
the bottom bracket, you can easily install
a bash guard.
This Zippa light taco bash is the most expensive
thing in this video at $45, and it includes
a spare.
Installing it is not rocket science and it
provides clear benefits, absorbing impacts
from below that would otherwise damage your
chainring.
Even if you don’t have these bolt holes,
you can still install a bash guard around
your chainring for even cheaper.
If you wash your bike, which you probably
should, you’ll need to re-lubricate your
drivetrain.
Dry lube is the way to go.
This particular stuff is teflon based.
You spray it on, cycle your drivetrain, and
it gets into all the nooks and crannies.
The liquid part dries up, leaving a slippery
teflon residue behind.
But why is this better than chain oil?
I’m marking these two lengths of chain.
This green one is coated in dry lube, while
this pink one is coated in chain oil.
Now to mine some dry dirt off the back tire
of the murder machine.
It’s easy to see that the dry lubed chain
collected less dirt.
I’ve been having great success with this
stuff, but any dry lube will keep your drivetrain
cleaner than chain oil.
Just be sure to keep it far away from your
rotors.
Speaking of chains, they are one of the cheapest
things you can replace on your drivetrain,
and doing so often will increase its longevity.
Just count the gears on your cassette and
that’s what kind of chain your need.
10 speed, 11 speed, 12 speed.
It’s really that easy.
A good 11 speed chain is around $25, and even
a really fancy gold chain is $60.
Most mountain bikes these days come tubeless
ready, which means you can remove your inner
tubes and run lower tire pressure.
The parts you’ll need are not expensive.
Just buy tubeless sealant and valve stems.
Most tubeless ready rims come with this tape
already on them, but if not you can buy it
or use gorilla tape.
The process basically involves unseating the
tire, installing the valve stem, pouring in
the sealant, closing everything back up, and
pumping up the tire.
I’ll spare you the details and leave some
resources below in case you want to do this.
Brake pads come in many varieties, and they’re
optimized for different uses.
For instance high speed pads work best once
they heat up, while comfort pads work optimally
right away but fade in performance if they
get too hot.
Upgrading your brake pads it not expensive
in the least, and it’s very easy to do.
New brake pads need to be bedded in before
use, and we covered that in another video.
Right now, it’s too nasty out to go bed
my brake pads, so let’s see if we can figure
out a way to do it indoors.
Maybe just watch my other video and do it
the normal way.
If you have a two by or three by drivetrain,
it means you have shifting up at the front
of your bike as well.
While this does provide a lot of range and
gearing options, it’s also more complex.
I actually snapped a chain right here because
it got tangled up in my wheel, and I’m not
surprised.
If you’re okay with losing a bit of range,
you can go one by.
This involves removing all your front chainrings,
a length of chain, your front derailleur,
shift cable, and shifter.
In their place: this relatively inexpensive
single speed chainring.
Since single speed chainrings don’t need
to shift, their teeth can be optimized to
hold the chain on, and performing such a conversion
can improve reliability, make your bike quieter,
increase ground clearance, reduce cockpit
clutter, and reduce the weight of your bike
by a whole pound.
Of course, in my case I installed a larger
11 speed cassette and Box One derailleur,
but that’s going to be out of reach for
this video.
I hope you found some of these upgrades useful
or at the very least, entertaining.
Do check out the links and resources in the
description, as well as my previous cheap
upgrades video that I made back in 2016.
Now at any budget you can improve your bike’s
performance, increase its longevity, or at
least give yourself the illusion that you’re
doing so.
Thanks for riding with me today, and I’ll
see you next time.
댓글 0개
등록된 댓글이 없습니다.